k8s-cleaner
What is k8s-cleaner?
The Kubernetes controller Cleaner (k8s-cleaner) identifies, removes, or updates stale/orphaned or unhealthy resources to maintain a clean and efficient Kubernetes cluster.
It is designed to handle any Kubernetes resource types (including custom Kubernetes resources) and provides sophisticated filtering capabilities, including label-based selection and custom Lua-based criteria.
Pre-requisites
To work with the k8s-cleaner, ensure you have the below points covered.
- A Kubernetes cluster
- kubectl CLI installed
- kubeconfig for authentication
Installation
Kubernetes Manifest
The k8s-cleaner can be installed in any Kubernetes cluster independent if it is in an on-prem or in a Cloud environment. The k8s-cleaner can be deployed down the clusters with your favourite Continious Deployment tool! The installation is pretty simple.
!!! example “”
```bash
$ export KUBECONFIG=
$ kubectl apply -f https://raw.githubusercontent.com/gianlucam76/k8s-cleaner/v0.20.0/manifest/manifest.yaml
```
!!! note
The above command will create a new namespace with the name projectsveltos and install the Kubernetes cleaner controller there.
Helm Chart
There is the option to install the k8s-cleaner with a Helm chart. To do so, simply follow the commands listed below.
!!! example “”
bash
    $ helm install k8s-cleaner oci://ghcr.io/gianlucam76/charts/k8s-cleaner \
        --version 0.20.0 \
        --namespace k8s-cleaner \
        --create-namespace #(1)
1. It will create the namespace k8s-cleaner and deploy everything in the namespace
Validation
$ kubectl get namespace
NAME              STATUS   AGE
default           Active   6h11m
k8s-cleaner       Active   34s
kube-node-lease   Active   6h11m
kube-public       Active   6h11m
kube-system       Active   6h11m

$ kubectl get all -n k8s-cleaner
NAME                               READY   STATUS    RESTARTS   AGE
pod/k8s-cleaner-78b9d794c5-jpp76   2/2     Running   0          43s

NAME                          TYPE        CLUSTER-IP      EXTERNAL-IP   PORT(S)    AGE
service/k8s-cleaner-metrics   ClusterIP   10.43.149.237   <none>        8081/TCP   43s

NAME                          READY   UP-TO-DATE   AVAILABLE   AGE
deployment.apps/k8s-cleaner   1/1     1            1           43s

NAME                                     DESIRED   CURRENT   READY   AGE
replicaset.apps/k8s-cleaner-78b9d794c5   1         1         1       43s
!!! tip Before getting started with the k8s-cleaner, have a look at the Features section. Familiarise with the label filters, store resource, update resources, resource selector, and schedule sections. Use the examples provided and familiarise with the syntax and the capabilities provided
Web Dashboard
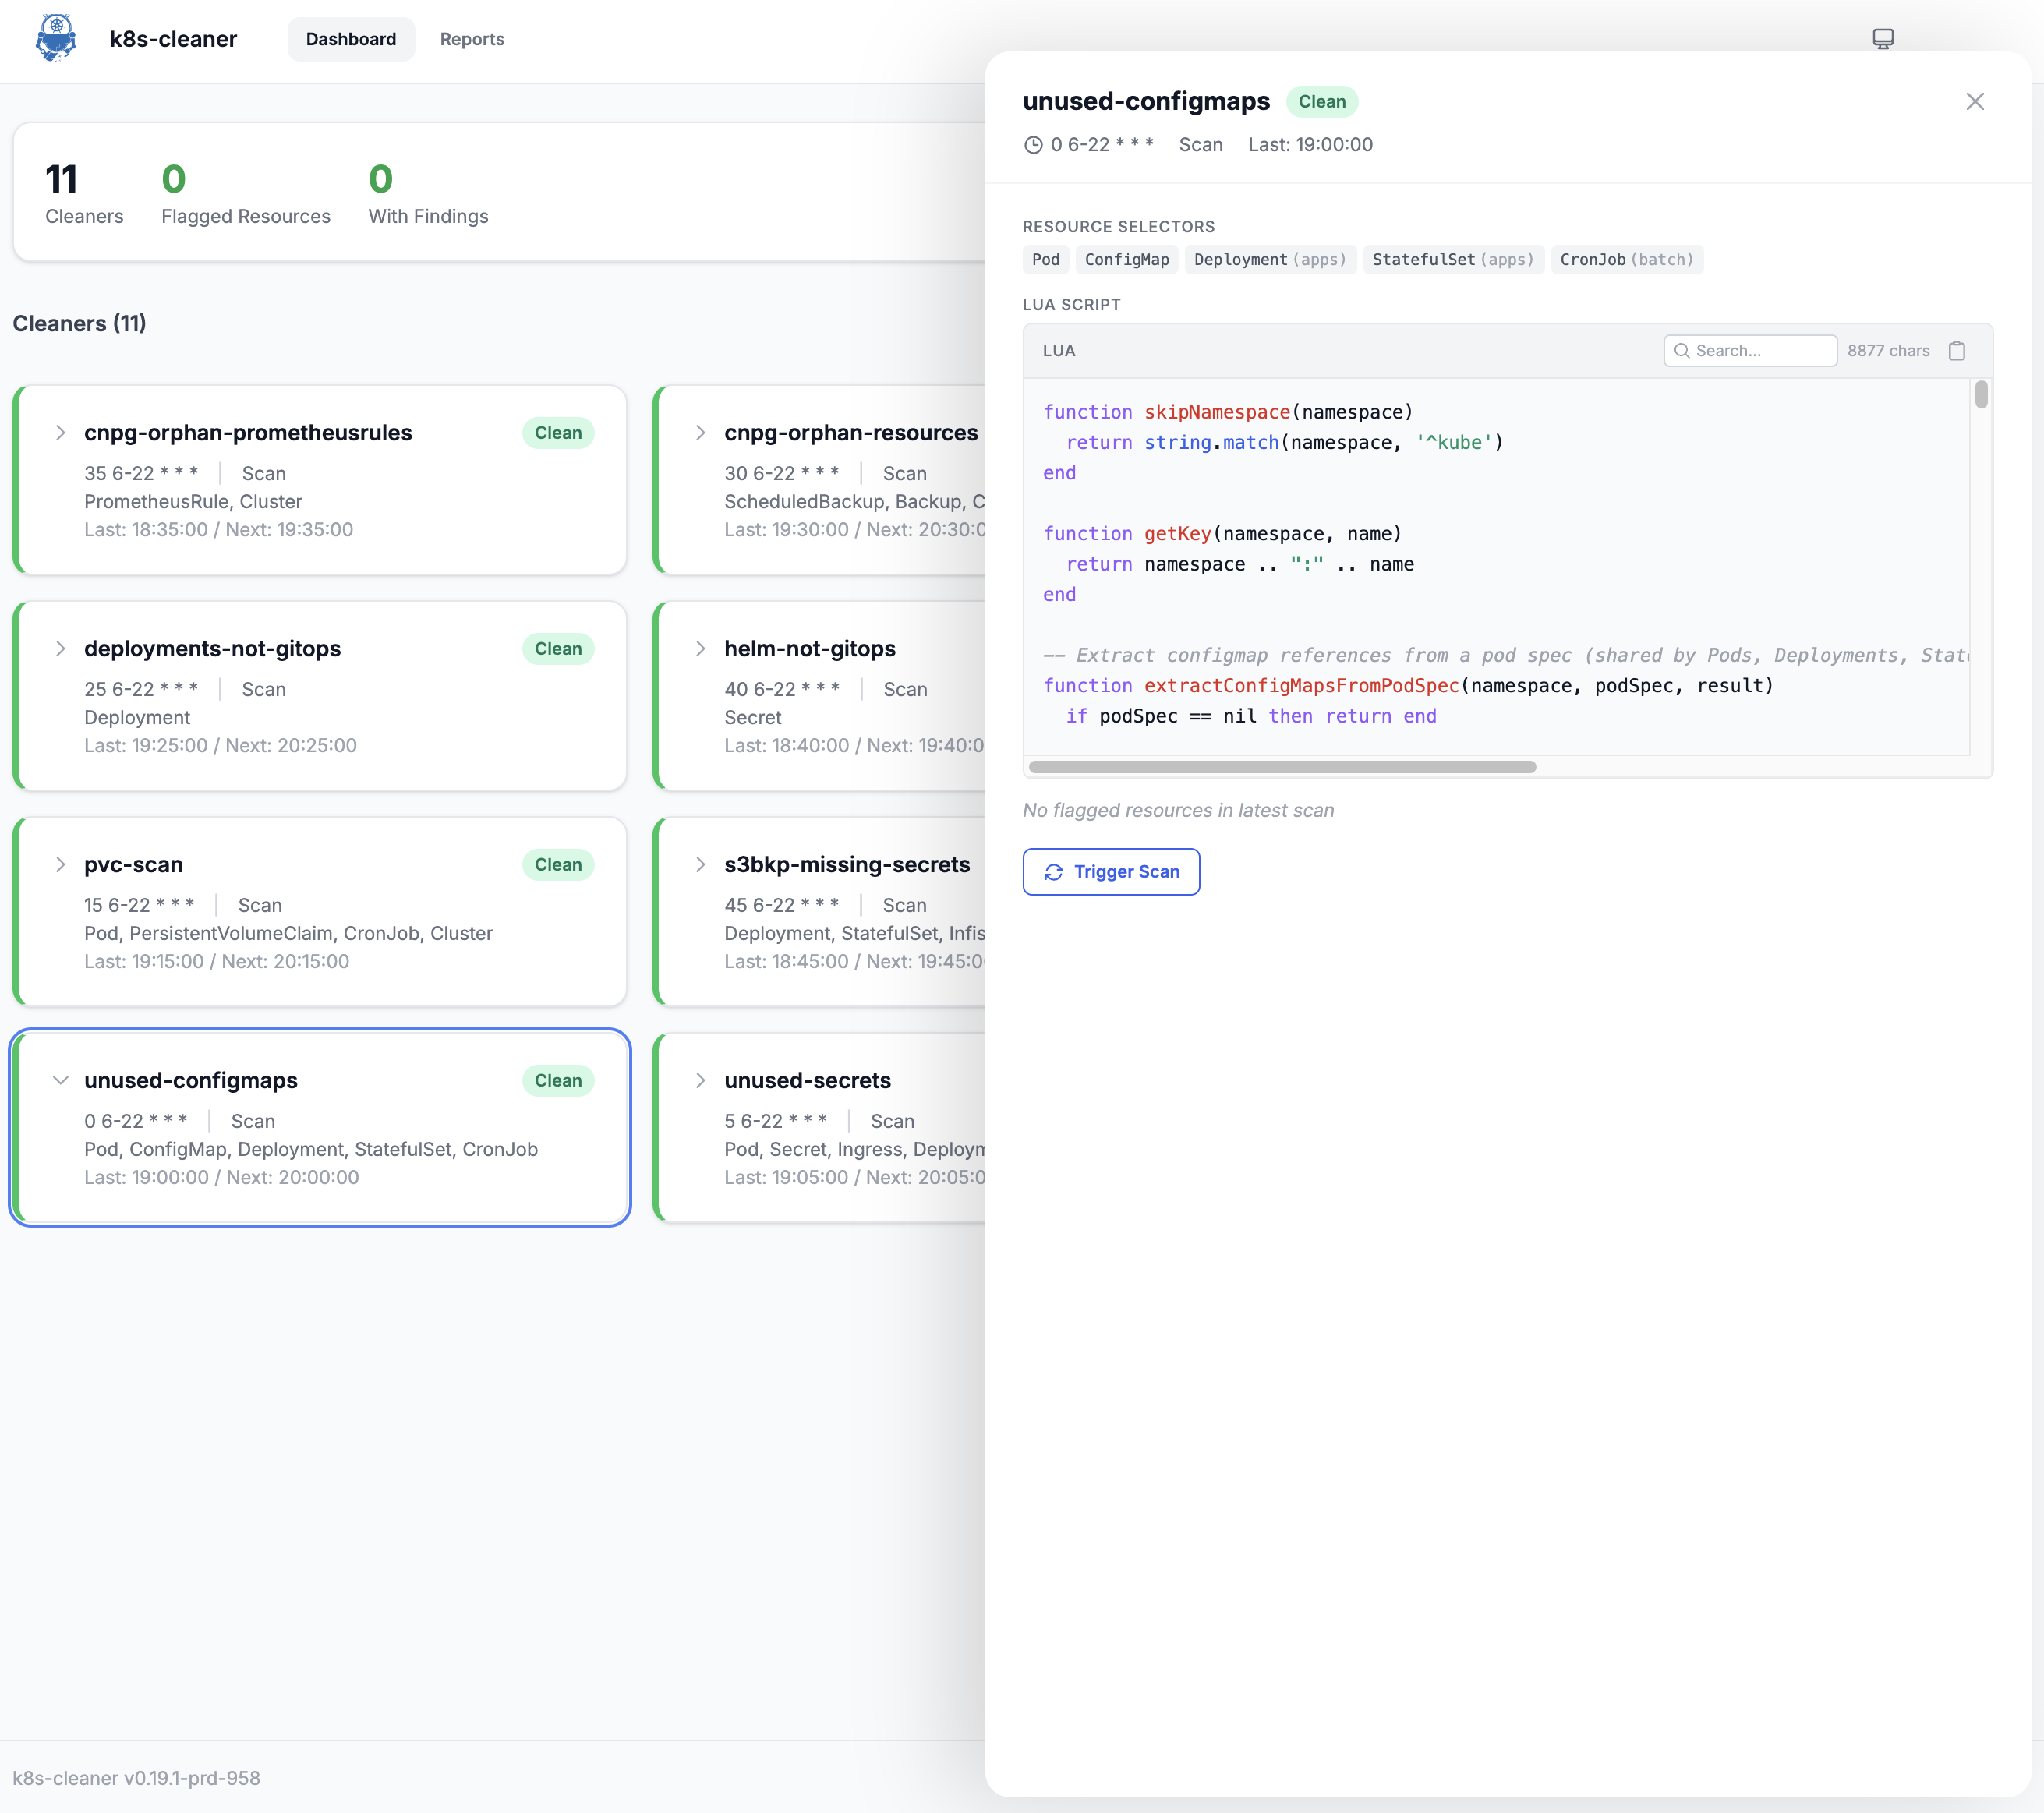
The k8s-cleaner includes an optional embedded web dashboard that provides a visual interface to manage your cluster’s health. It is a lightweight designed to give you instant visibility into your scan results.
Key Features
- Visual Summaries: A masonry card layout sorted by severity to help you prioritize issues.
- On-Demand Triggers: Manually initiate specific cleaners or run a full cluster scan directly from the UI.
- Lua Script Viewer: Browse and search your custom Lua logic with syntax highlighting and a copy-to-clipboard feature.
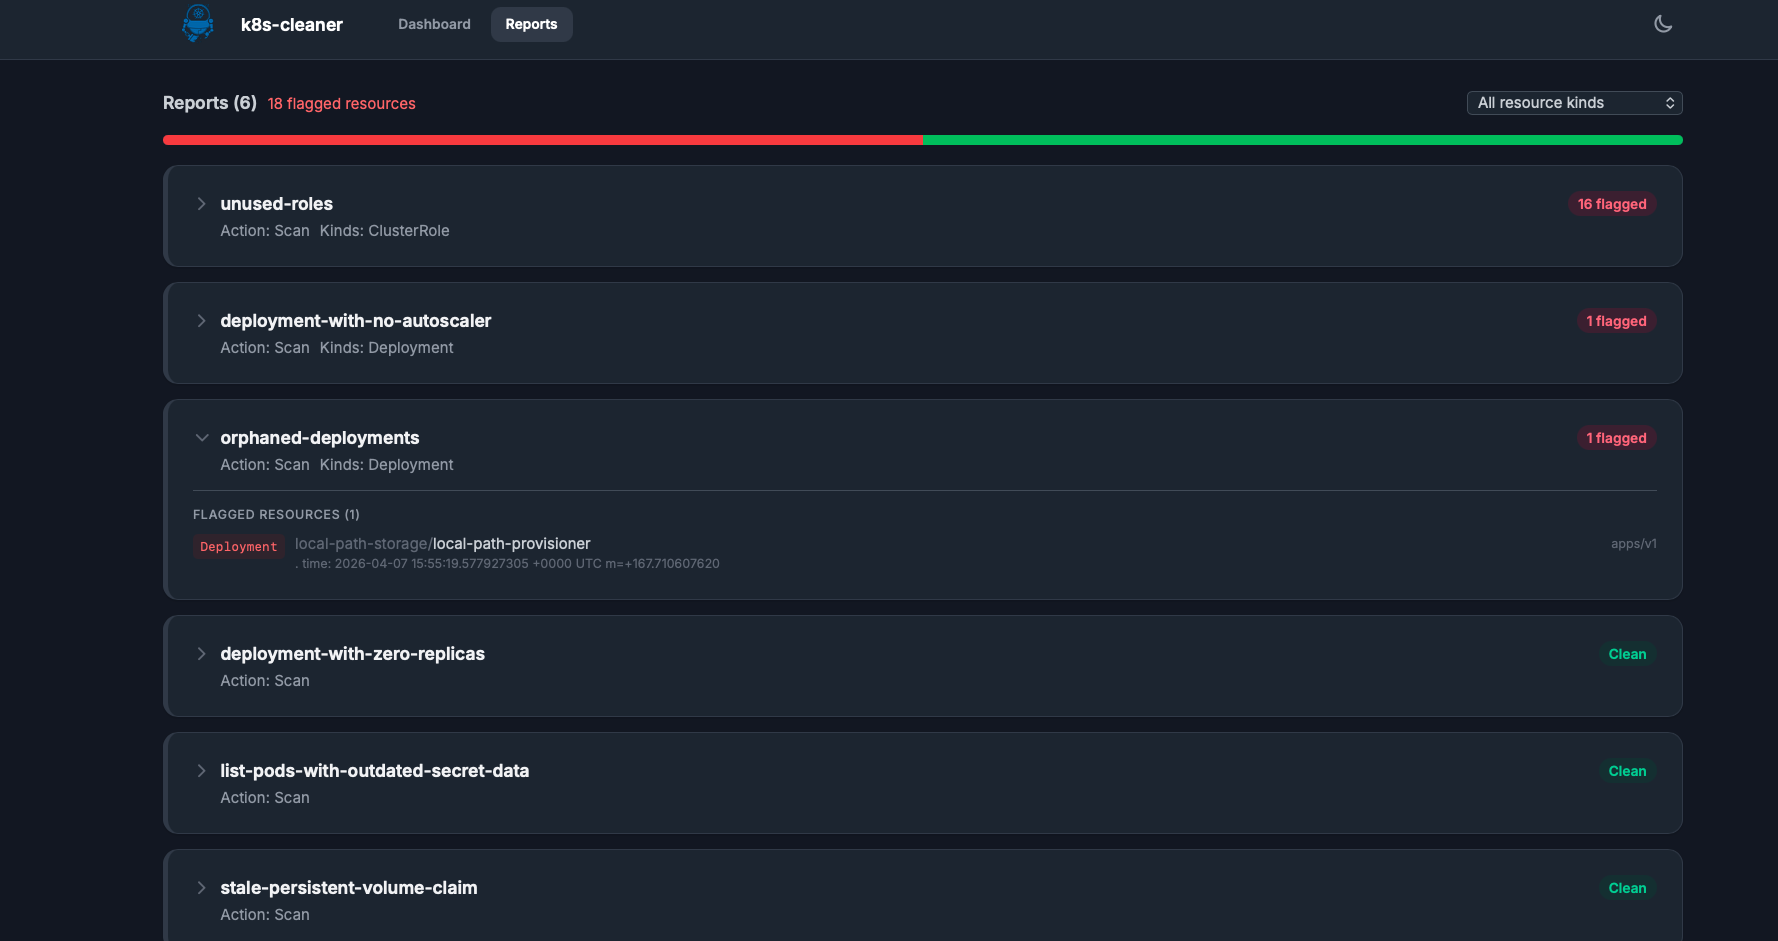
- Report Browser: Filterable scan reports with status bar charts to track resource improvements over time.
- Flexible Access: Supports dark/light modes, responsive mobile layouts, and an optional Read-Only mode for production environments.
⚠️ Important: Data Requirements
The dashboard does not “poll” the cluster directly for matches; instead, it visualizes CleanerReport objects. For a Cleaner instance to appear in the dashboard, you must configure it to generate a report via the notifications field.
Without this configuration, the dashboard will remain empty even if the Cleaner is active.
Add the following to your Cleaner custom resources to enable reporting:
spec:
  # ... other cleaner settings ...
  notifications:
    - name: report
      type: CleanerReport
Enabling the Dashboard via Helm
The dashboard is disabled by default. To enable it during installation, set the web.enabled value to true.